| |
 |
|
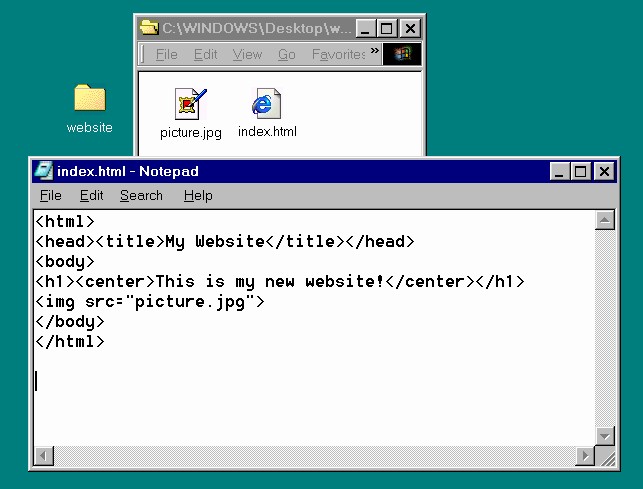
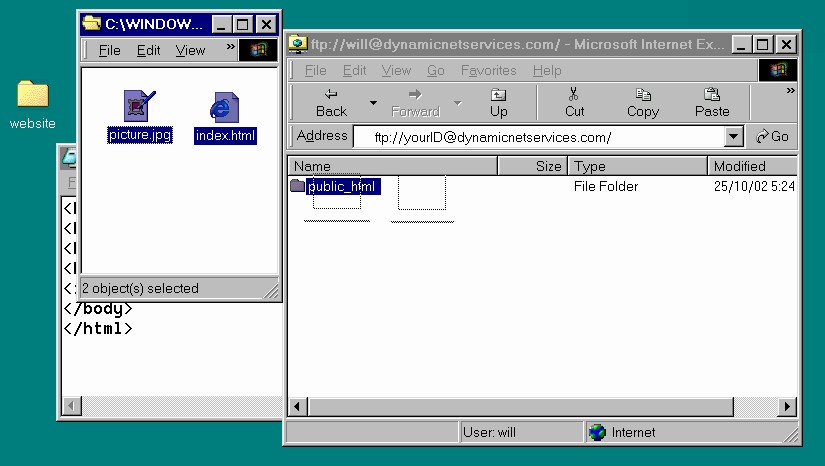
Step 1 - Creating your web site
The first step is to create the contents of your web site. For this
tutorial, we have created a simple web page containing some text
and one picture. Look at the following figure. You can see that
on the desktop we have a directory called "website".
The directory is open, and you can see there are two files,
"index.html" and "picture.jpg".
The index.html
file was created with Notepad, and you can see the HTML
commands in the Notepad window.
If you don't know HTML, there are lots of guides for beginners
available on-line, or you can use a web authoring tool instead.
(For a list of HTML guides and HTML authoring tools, see
our support page.)
You must have a file called index.html as the
home page of your web site. Any other files can be named anything
else that you want. Note that index.htm is not the same
as index.html, and capital letters are different than
lower-case letters.
You can see in the HTML that the image is referred to in the
<img> tag as
picture.jpg. All of your images and links, in HTML, can be
this simple. You don't need to specify the whole name of the server
everytime you link to something. Some people like to put all of
their pictures in an images subdirectory. This is fine,
just remember, in your HTML, that the reference would then be
"images/picture.jpg".
|
|
|
| |
|
|
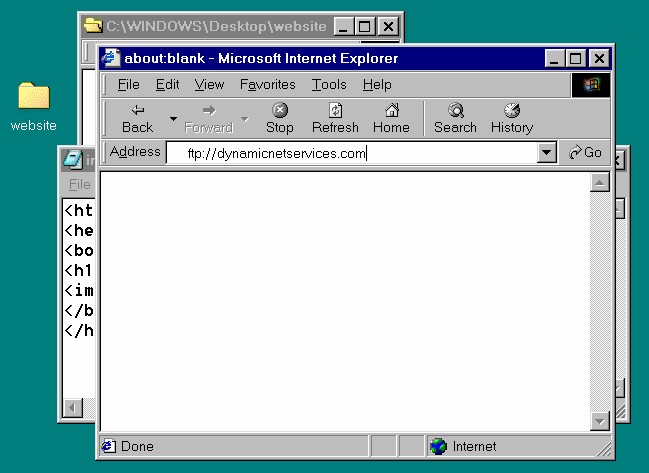
Step 2 - Use Internet Explorer to connect to the server
Next, start Internet Explorer. We are going to
connect to the server using the FTP protocol. See
the figure. We've typed
"ftp://dynamicnetservices.com"
into the address bar. Press enter, and move on to step 3.
|
|
|
| |
|
|
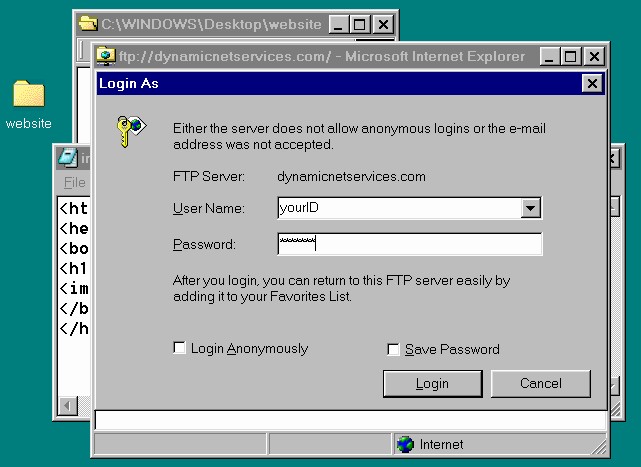
Step 3 - Enter your user ID and password
Internet Explorer needs to know your user ID and password
before it can connect to the server. Enter them. Note that
your password will look like
"*****".
That's so nobody else can
see your password as you type it. Be sure to enter your user
ID and password correctly. Capital versus lower-case letters
are important! If you are having difficulty connecting,
make sure you don't accidentally have the Caps-Lock key on
while you type your user ID or password.
When you are ready, click
on the Login button at the bottom.
|
|
|
| |
|
|
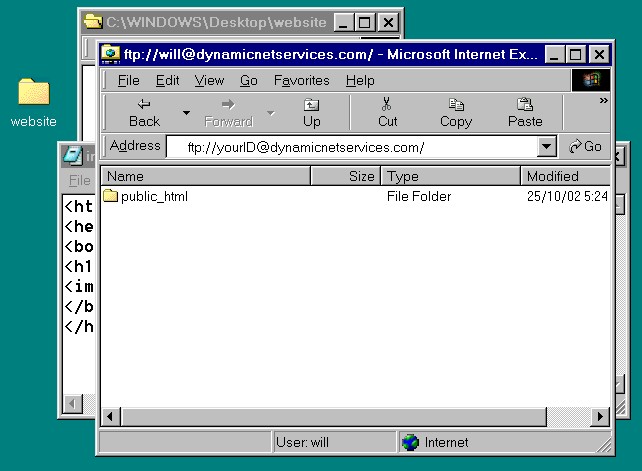
Step 4 - You are now connected
At this point, if everything worked, you should see your
public_html directory on the server
as in the following figure.
If you don't see the
public_html directory, there must be
something wrong. Did you enter the correct user ID and
password? Did you type in everything exactly as it
appears in Step 2? Go back and try again.
|
|
|
| |
|
|
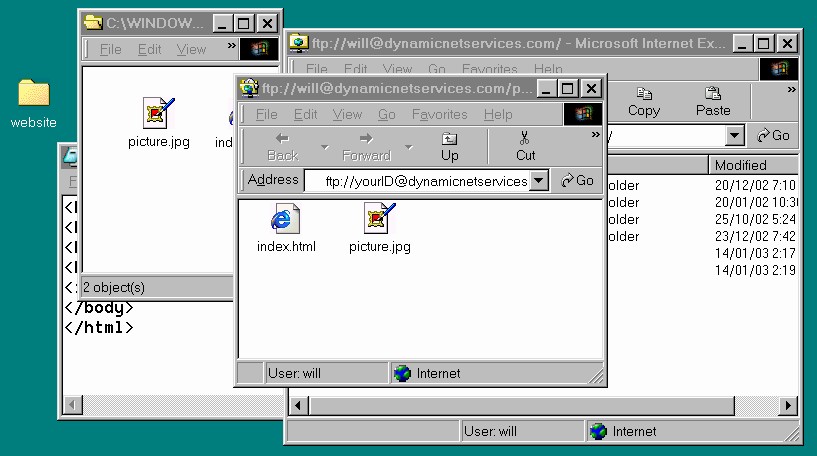
Step 5 - Transfering your files
Arrange your windows so you can see your files on the screen
(index.html and whatever other files are part of
your web site).
Select all of the files, and simply
drag-and-drop them onto the public_html
directory in the browser window. (So, select your files. Then
click on one of your files and hold down the mouse button.
Drag the mouse over to the public_html directory, then
release the mouse button.)
Make sure that you put the files into the
public_html directory, not beside it.
After you drag-and-drop the files, the browser window should
look just like it did in Step 4, above. If, instead, the
browser window now shows public_html and
your files, then you missed. Try again. When you are fairly
sure the files are in the public_html
directory, double click on public_html
so you can see that your files are indeed inside...
|
|
|
|
| |
|
|
Step 6 - Double-checking that the files are in the correct spot
After you have double-clicked on the public_html
directory, you should see a browser window showing the contents of
the public_html directory. Double-check that
all of your files are there. If you've missed some, transfer them
now (just drag and drop them into the public_html
directory).
|
|
|
|
| |
|
|
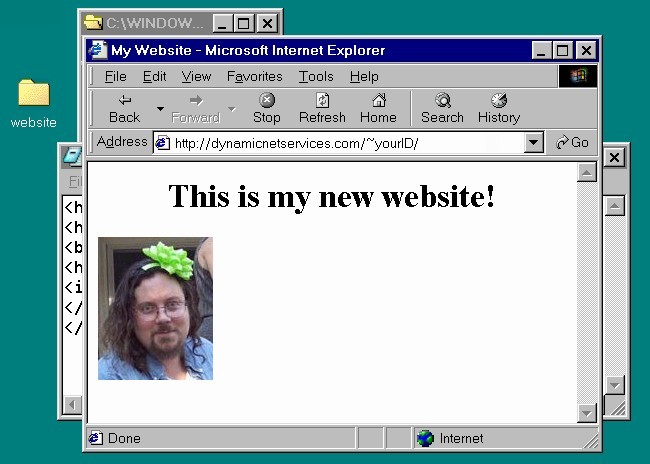
Step 7 - Checking, can you see your web site?
You are done! Just open a new Internet Explorer window,
and type in
"http://dynamicnetservices.com/~yourID"
and you should see your web site! If anything is missing,
go back to Step 5, and transfer the missing files.
|
|
|
| |
|
|
More Information?
sales@dynamicnetservices.com
|
|
